How to Charge a Portable Power Hub With a Solar Panel
Charging a portable power station using solar energy provides a reliable method to maintain power while camping, traveling, or preparing for grid outages. The process relies on matching the electrical output of your solar panels to the input specifications of your power hub. Because manufacturers design different models with varying voltage ranges, connector types, and built-in management systems, following a structured setup ensures efficient energy transfer and protects your equipment. This guide outlines the verified steps for connecting solar panels to a portable power station, along with practical considerations for maximizing performance in real-world conditions.
Understanding the Core Components
A complete solar charging system typically includes three main elements: the photovoltaic panels, the portable power station, and the necessary cabling or charge controller. Solar panels generate direct current (DC) electricity when sunlight excites electrons within their photovoltaic cells. This raw DC output requires regulation before entering the power station’s battery, which is why many setups incorporate a charge controller. The controller manages voltage and current flow, ensuring the battery charges at a safe rate without overloading [1].
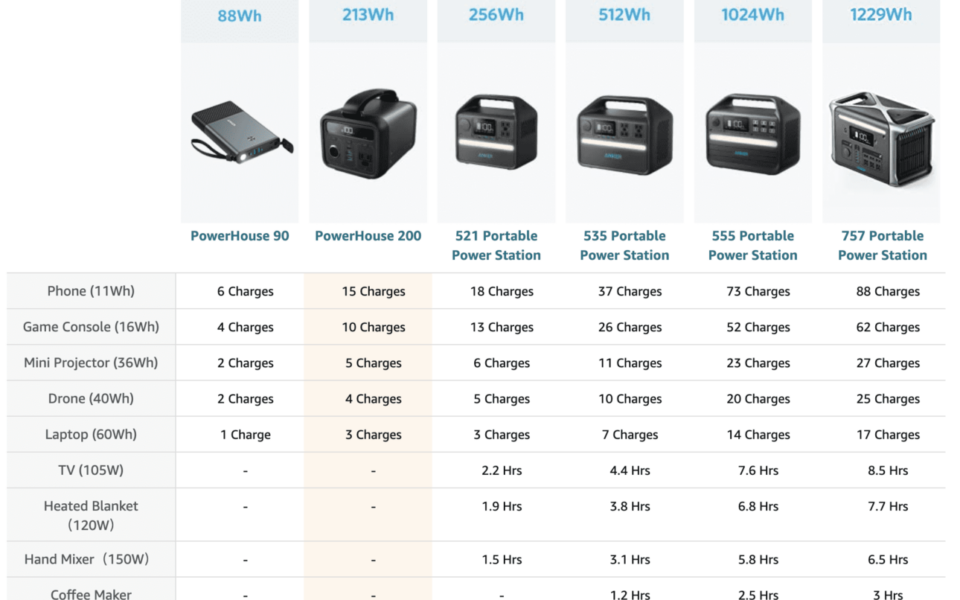
Modern portable power stations often integrate the battery, charge controller, and inverter into a single unit. The battery stores the incoming solar energy, the charge controller regulates the input, and the inverter converts stored DC electricity into alternating current (AC) for standard household devices [2]. Some units feature dedicated solar input ports labeled “Solar Input” or “DC In,” allowing direct cable connections [3]. Other models require an external charge controller to bridge the panel and the station. Always check your specific device’s manual to determine whether your system uses a built-in controller or requires an external one.
*Product specification note:* Connector types, port labels, maximum input voltages, and included cables vary significantly across brands and model years. Manufacturers frequently update hardware designs and firmware. Before purchasing cables or panels, verify the current input specifications and required connector types directly with the manufacturer or authorized retailer listing.
Step-by-Step Connection Guide
Verify Compatibility Before Plugging In
Mismatched components are a frequent cause of poor performance or potential damage. The solar panel’s voltage and wattage must align with the power station’s accepted input range [2]. When evaluating compatibility, focus on two key electrical metrics: open circuit voltage (Voc) and maximum input voltage (Vmax). If connecting multiple panels in series, the combined Voc must never exceed the power station’s Vmax rating. Voltage fluctuations caused by temperature changes can push readings outside safe operating limits, so always keep the solar input voltage within the manufacturer’s specified range [4].
Confirm compatibility by locating the technical specifications printed on the back of your solar panels and cross-referencing them with the solar input port ratings listed in your power station’s manual. If the panel’s output exceeds the station’s limits, do not connect them directly. Instead, verify whether a compatible third-party charge controller or voltage regulator is recommended for your specific model.
Connect the Hardware
Once compatibility is confirmed, begin the physical connection. Most solar panels ship with MC4 connectors, which are widely compatible with charge controllers and many power stations [1]. Attach the panel’s positive and negative leads to the corresponding inputs on the charge controller, ensuring the clips snap securely into place. Loose connections can cause power loss, arcing, or intermittent charging [1].
Next, link the charge controller to the power station using a cable with the correct connectors on both ends. Many modern units include dedicated solar charging ports designed to accept either direct panel connections or controller outputs. These ports are typically marked clearly on the chassis [1]. If your power station supports direct solar input without an external controller, connect the panel cable straight to the designated solar port [3].
For users planning to expand their array with multiple panels, parallel wiring requires T-branch or Y-branch extension cables to consolidate leads of the same polarity before reaching the power station [4]. Secure all terminals tightly, and route cables away from sharp edges or moving parts to prevent insulation damage.
Position and Angle the Panels
Electrical output depends heavily on sunlight exposure. Even experienced users experience significant power drops when panels are placed flat on the ground or positioned in shaded areas [2]. Align the panels with the sun’s path throughout the day. In the northern hemisphere, face the panels toward true south and set the tilt angle between 30 and 45 degrees relative to the ground [2]. Seasonal adjustments may be necessary to account for the sun’s shifting altitude.
Adjustable mounting brackets allow users to fine-tune the angle as daylight progresses, though folding or briefcase-style panels are often preferred for their portability and ease of deployment [2]. Regardless of the mounting style, ensure the surface remains clean and free of debris, as dust, pollen, or bird droppings can block light and reduce efficiency.
Monitor the Charging Process
After completing the connections, initiate the charging sequence. Many contemporary power stations feature integrated digital displays that show real-time charging status, input wattage, and estimated time to full capacity [1]. Observe the screen to confirm that the unit recognizes the solar input and begins drawing power.
If the display shows no activity, double-check every terminal for tightness and verify that the correct input port was selected based on the panel’s actual specifications [4]. Adjusting the wiring configuration or switching between high-voltage and low-voltage solar ports may resolve discrepancies between expected and actual charging speeds [4]. Weather conditions, ambient temperature, and panel orientation directly influence real-world performance, so expect variable output rates rather than constant peak wattage [4].
Practical Limitations and Environmental Factors
Solar charging is inherently dependent on environmental conditions. Cloud cover, atmospheric haze, and seasonal daylight hours will reduce the total energy harvested per day. High ambient temperatures can also impact efficiency; extreme heat waves and freezing conditions can degrade battery health over time [5]. While panels themselves function in cold weather, prolonged exposure to intense heat can stress internal components and accelerate chemical aging in the battery.
Additionally, the size of your solar array dictates how quickly the power station replenishes. A smaller wattage panel will take considerably longer to charge a large-capacity unit compared to a multi-panel high-output setup. Calculate your daily energy consumption against realistic solar yield to determine whether your current array meets your needs. If charging times exceed expectations, verify that you are using manufacturer-approved cables and power sources, as non-certified accessories can restrict current flow or trigger safety cut-offs [5].
Safety and Battery Longevity Guidelines
Protecting your investment requires adherence to established maintenance practices. Avoid exposing the power station to extreme temperatures whenever possible, as sustained heat or freezing conditions can compromise long-term battery health [5]. When storing the unit for extended periods, maintain the charge level around 50 percent to preserve cell chemistry [5].
Repeatedly draining the battery to zero percent can shorten its overall lifespan. Recharge the unit before it drops below a 20 percent threshold, and avoid leaving it discharged for weeks at a time [5]. Always use charging cables and adapters recommended by the manufacturer to safeguard internal circuitry from voltage spikes or incompatible current loads [5].
Unlike traditional gas or propane generators, portable power stations operate silently and produce zero emissions, making them suitable for indoor garage storage or enclosed outdoor spaces [5]. Do not modify the internal wiring or bypass the built-in charge controller, as doing so voids warranties and creates fire hazards.
Troubleshooting Common Issues
Several predictable problems can interrupt the solar charging process. If the power station fails to recognize the solar input, first confirm that the connected panels match the power station’s voltage and wattage requirements [2]. Verify that the correct input port is being used and that all connectors are fully seated [4].
Slow or inconsistent charging often points to suboptimal panel placement or environmental interference. Check for partial shading, dirty surfaces, or incorrect tilt angles [2]. If multiple panels are wired together, ensure that parallel connections utilize the proper T-branch or Y-branch cables and that all leads share the same polarity [4].
When charging power levels do not align with the rated specifications of your solar array, adjust the physical connections to eliminate loose contacts, and reconfirm that the panels are routed through the appropriate solar input port based on their actual output characteristics [4]. If issues persist after verifying wiring, angle, and compatibility, consult the manufacturer’s troubleshooting documentation or contact technical support with your specific model number and setup configuration.
Conclusion
Charging a portable power hub with solar panels requires careful attention to electrical compatibility, secure physical connections, and strategic panel placement. By verifying voltage limits before plugging in equipment, using the correct cables and connectors, angling the panels toward optimal sunlight, and monitoring the built-in display, users can safely and efficiently replenish their power reserves. Environmental conditions and battery maintenance practices will ultimately dictate long-term reliability, so storing the unit correctly, avoiding deep discharges, and using approved accessories will extend the lifespan of your system. Always cross-reference your hardware specifications with the latest manufacturer guidelines before deploying new panels or cables, as product designs and input tolerances continue to evolve. Verify all connector types, port ratings, and accessory compatibility against the current manufacturer or retailer listing before purchase.
Sources
[1] https://oupes.com/a/blog/post/8-key-factors-to-consider-before-purchasing-portable-solar-panels\n[2] https://oupes.com/a/blog/post/how-to-charge-power-station-with-solar-panel\n[3] https://www.bluettipower.ca/blogs/knowledge-base/charge-portable-power-station-with-solar-panel\n[4] https://manuals.ecoflow.com/cn/product/delta-pro-3-portable-power-station?lang=en_US\n[5] https://www.reliant.com/en/blog/home-automation-and-smart-energy/portable-power-stations